TP-Link VIGI App for iPhone & iPad (iOS) - Download
The TP-Link VIGI app is a robust solution for managing your TP-Link IP cameras and NVRs directly from your iPhone or iPad. With a focus on security and convenience, the app provides seamless access to live feeds, video playback, and smart alerts. This guide will walk you through the process of installing and using the TP-Link VIGI app on your iOS devices, ensuring a smooth and efficient experience.
Why Choose the TP-Link VIGI App for iOS?
Whether you’re managing a home security system or overseeing business operations, the TP-Link VIGI app brings advanced features to your fingertips. Key benefits include:
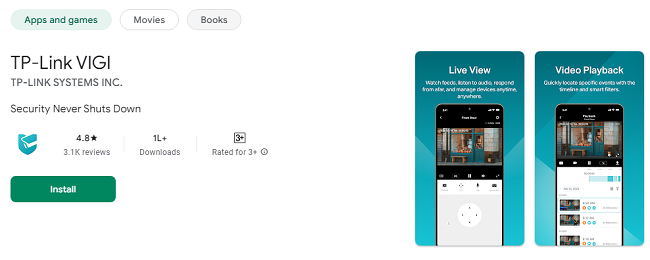
Real-Time Monitoring: View live camera feeds anytime, anywhere.
Playback Capabilities: Access previously recorded footage with ease.
Smart Alerts: Receive instant notifications for motion detection and other security events.
User-Friendly Interface: Designed for simplicity and efficiency, even for first-time users.
Compatibility: Optimized for iPhone and iPad devices running iOS 11 or later.
Download TP-Link VIGI App for iPhone & iPad
1. Check Device Compatibility
Before installing the app, ensure your iPhone or iPad meets the following requirements:
Operating System: iOS 11 or later.
Storage Space: At least 100 MB of free storage.
Stable Internet Connection: Required for downloading and using the app effectively.
2. Download the TP-Link VIGI App
Open the App Store: On your iPhone or iPad, tap the App Store icon.
Search for the App: Use the search bar to type “TP-Link VIGI” and tap the search button.
Select the App: Locate the official TP-Link VIGI app in the search results and tap on it.
Download the App: Tap the Get button, and authenticate the download using Face ID, Touch ID, or your Apple ID password.
Wait for Installation: The app will automatically install once the download is complete.
3. Open and Set Up the App
Launch the App: Tap the TP-Link VIGI icon on your home screen.
Sign In or Create an Account: Enter your TP-Link credentials or create a new account if you don’t already have one.
Grant Permissions: Allow the app to access necessary permissions, such as notifications and location services, for optimal functionality.
How to Use TP-Link VIGI App on iPhone & iPad?
Once the app is installed, you can begin managing your security system with these simple steps:
1. Add Your Devices
Tap the “Add Device” Button: Located on the home screen of the app.
Scan the QR Code: Use your iPhone or iPad’s camera to scan the QR code on your TP-Link device.
Follow the On-Screen Instructions: Complete the setup process by entering the required details, such as Wi-Fi credentials.
2. Monitor Live Feeds
Select a Camera: Tap on the camera icon from the list of connected devices.
View the Feed: The live feed will appear in high definition, with options to adjust the resolution if needed.
Take Screenshots or Record Videos: Use the on-screen controls to capture important moments directly to your device.
3. Access Playback Features
Navigate to Playback: Tap the “Playback” option from the app’s main menu.
Select a Timeframe: Choose a specific date and time to review recorded footage.
Use Playback Controls: Pause, rewind, or fast-forward the video for detailed analysis.
4. Configure Smart Alerts
Go to Settings: Access the app’s settings menu by tapping the gear icon.
Enable Notifications: Toggle on push notifications for motion detection and other events.
Set Activity Zones: Define specific areas for the camera to monitor, reducing false alarms.
5. Manage Multiple Devices
Add Additional Cameras or NVRs: Repeat the “Add Device” process for each new device.
Group Devices: Organize cameras into groups for easier management.
Switch Between Devices: Use the app’s intuitive interface to toggle between live feeds and settings for multiple cameras.
Advanced Features of the TP-Link VIGI App
1. Two-Way Audio Communication
For cameras equipped with microphones and speakers:
Access the live feed of the desired camera.
Tap the microphone icon to speak directly through the camera.
Listen to responses or background sounds from the monitored area.
2. Cloud Storage Integration
If you’ve subscribed to TP-Link’s cloud storage service:
Access recorded footage from anywhere without relying on local storage.
Enable automatic backups to ensure data safety.
3. Firmware Updates
Keep your devices up to date:
Navigate to the app’s settings.
Check for available firmware updates for connected devices.
Install updates directly through the app.
Troubleshooting Common Issues
1. App Not Opening
Ensure your iOS device is running the latest software version.
Restart your device and try launching the app again.
2. Unable to Add Devices
Verify that your camera or NVR is powered on and connected to the same network as your iOS device.
Check that you’re entering the correct Wi-Fi credentials.
3. Notifications Not Working
Ensure that notifications are enabled in both the app settings and your device’s settings.
Check your internet connection for stability.
4. Poor Video Quality
Adjust the resolution settings within the app to suit your network’s bandwidth.
Ensure your camera’s lens is clean and unobstructed.
Tips for Optimizing the TP-Link VIGI App Experience
Stable Wi-Fi Connection: Ensure your iPhone or iPad is connected to a reliable Wi-Fi network for uninterrupted access.
Regular Updates: Keep the app and your devices updated to enjoy the latest features and security enhancements.
Customize Settings: Tailor the app’s settings to suit your specific security needs, such as enabling activity zones and adjusting notification preferences.
Secure Your Account: Use a strong password and enable two-factor authentication for enhanced security.
Frequently Asked Questions (FAQs)
1. Is the TP-Link VIGI app free to use on iPhone and iPad?
Yes, the app is free to download and use. However, additional features like cloud storage may require a subscription.
2. Can I use the app on multiple devices?
Yes, you can install the app on multiple iPhones or iPads and log in with the same account.
3. What should I do if the app crashes frequently?
Ensure you’re using the latest version of the app. If the issue persists, reinstall the app or contact TP-Link support.
4. Is the TP-Link VIGI app compatible with all TP-Link cameras?
The app is designed to work with TP-Link’s VIGI series IP cameras and NVRs. Check your device’s compatibility before installation.
Conclusion
The TP-Link VIGI app for iPhone and iPad offers a comprehensive solution for managing your security system. From installation to advanced features like smart alerts and two-way communication, the app simplifies surveillance while ensuring your property’s safety. By following this guide, you’ll be able to install, set up, and optimize the app effectively, giving you peace of mind wherever you are.
Updates